High-heat infrared gas grills are…pardon the pun…hot! Fans say they take grilling to the next level. But, just exactly how are they different from traditional gas grills, and are they worth the hype?
Both grills use propane or natural gas for fuel, but they cook differently. In a traditional grill, flames from the burner heat the grilling grid and the air within the closed hood to cook by a combination of conduction cooking (when food contacts the hot grilling grid) and convection cooking (when hot air circulates around the food like an oven). Traditional gas grills work great, but there are some downsides. For one, cooking temperatures don’t always get high enough to produce a restaurant-quality, crusty sear. And, the circulating hot air can dry out foods.
An infrared grill cooks by radiant heat – the type of heat produced by the sun, and the same glowing, red, energy waves produced in a charcoal or wood fire. In an infrared grill, an emitter made of ceramic, stainless steel or glass, is either incorporated as part of the gas burner or positioned directly above it. Flames from the burner heat the emitter, which radiates infrared energy waves. These waves directly penetrate the food to cook it. The emitter also dramatically reduces or eliminates the hot air convection effect, preventing food from drying.
Early versions of infrared grills were one-trick ponies. They were great at searing and super-high-heat grilling, but lacked the ability to turn down the heat to cook at lower temperatures. Newer models have much wider temperature ranges and, as a result, much broader cooking capabilities
Food is Juicier — Infrared heat transfers to food without disturbing or destroying the moisture molecules that naturally exist as a protective barrier on the surface of proteins. Infrared’s super high heat quickly sears the meat, so juices are “locked in.” In fact, studies show infrared-cooked foods are 30-percent larger and heavier than traditionally grilled foods due to moisture retention.
Steakhouse Results – The high heat of an infrared grill – up to 1,000 degrees or more – produces a restaurant-quality sear that’s hard to replicate on most traditional grills.
Saves Time and Money — Infrared grills are very efficient, converting nearly all the fuel into heat energy. They also preheat in three to five minutes versus 10 minutes for a traditional gas grill, and can cook twice as fast as traditional gas grills. Because they use between 30- to 50-percent less fuel, they save cash.
Through Wind, Rain or Snow – A traditional gas grill loses temperature in cold or inclement weather. Cooking temperatures also drop every time you lift the lid to turn the meat or take a peek. Infrared energy is not impacted by weather, or by lifting the lid, so the grills maintain temperatures no matter what the conditions or whether the lid is open or closed.
Easy Cleaning – Because infrared grills cook at such high temperatures, drippings are usually vaporized before they ever reach the grease tray. Bottom line: less maintenance and clean-up.
Prices Have Come Down – When the original patent on infrared grills expired in 2000, more manufacturers started to offer them. More competition = lower prices. In addition, the technology has evolved in budget-friendly ways. Second- and third-generation units can now create infrared heat using standard gas burners in combination with metal or glass emitter plates – a much less expensive system than the costly, original ceramic infrared burners. The good news for backyard chefs: though still more expensive than many traditional gas grills, infrared grill prices have dropped.
Infrared grills can be configured in multiple ways. Some are made with only infrared burners. Others might have one infrared searing burner combined with two, three or more traditional burners in the base of the grill. Or, there might be a separate infrared side burner, sometimes called a searing station, built off to the side of a traditional grill. On these combination grills, meats are usually seared on the infrared burner, and then transferred to finish cooking over the traditional burners. If your grill has a vertical rotisserie burner at the back, chances are it is infrared, as well.
It takes a little trial and error to master infrared grilling. Because food cooks faster, timing on recipes may have to be adjusted. And, when you’re cooking at these high temperatures, you definitely don’t want to walk away from the grill, or you may come back to hockey pucks. But with a little practice, an infrared grill is just as easy to use as a traditional grill and yields very tasty, restaurant-worthy results.
For a complete list of replacement parts for infrared grills, visit www.appliancefactoryparts.com/gasgrillparts/
Lisa Mayer August 4th, 2015
Posted In: BBQ Maintenance
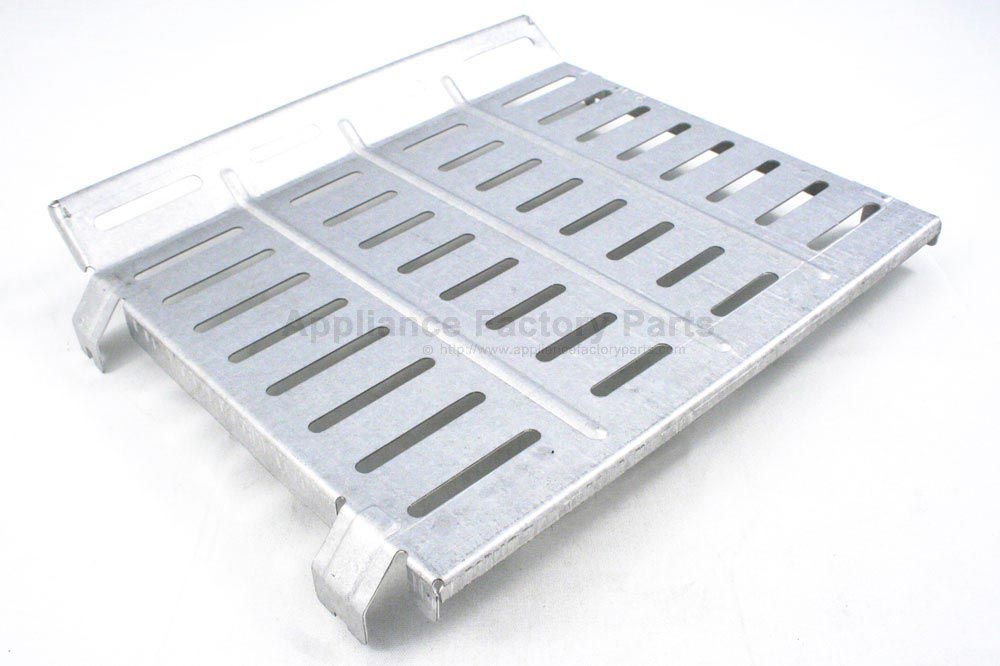
Great grilled food starts with a good cooking grid. It’s the secret to sensational sear marks, that sought-after crusty exterior, and maximum grill flavor. If your cooking grid is rusted, warped or burned through in spots, it might be time to replace it. Here’s what you need to know if you’re in the market for a new one.
Why is a good cooking grid important?
Outdoor grilling almost always involves three types of heat energy to cook food: radiant – the infrared energy generated by a charcoal or gas fire that excites and heats the molecules within food; convection – the movement of hot air inside the closed hood of the grill; and conduction – when food comes in direct contact with a hot surface. Cooking grids are responsible for conduction cooking and are what makes grilling … well, grilling.
Most cooking grids are made from one of five materials – chrome-plated steel, porcelain-coated steel, cast iron, porcelain-coated cast iron, and stainless steel. Each offers distinct differences in durability, how they retain and transfer heat, how easy they are to clean and maintain, and how much they cost.
The bars within a cooking grid come in different shapes and thicknesses and can be spaced close together, wide apart or somewhere in between. The configuration of the grid can impact cooking performance almost as much as the material they’re made of.
HOT TIP: Wider bars on a cooking grid offer more surface area for contact with the meat. This creates more pronounced grill marks.
The five main cooking grid materials:
HOT TIP: To make those iconic, cross-hatch grill marks, rotate food a quarter turn halfway through the cooking time required on the first side. Then repeat the process on the second side.
A pound of prevention…
A little ongoing maintenance will help preserve your cooking grid for years to come, no matter the material or configuration. Whether you’re grilling filet mignon or a humble hot dog, it’s important to start with a clean, hot, oiled cooking grid.
For a complete list of replacement cooking grids, select your brand and model.
Lisa Mayer June 16th, 2015
Posted In: BBQ Maintenance, BBQing HowTos
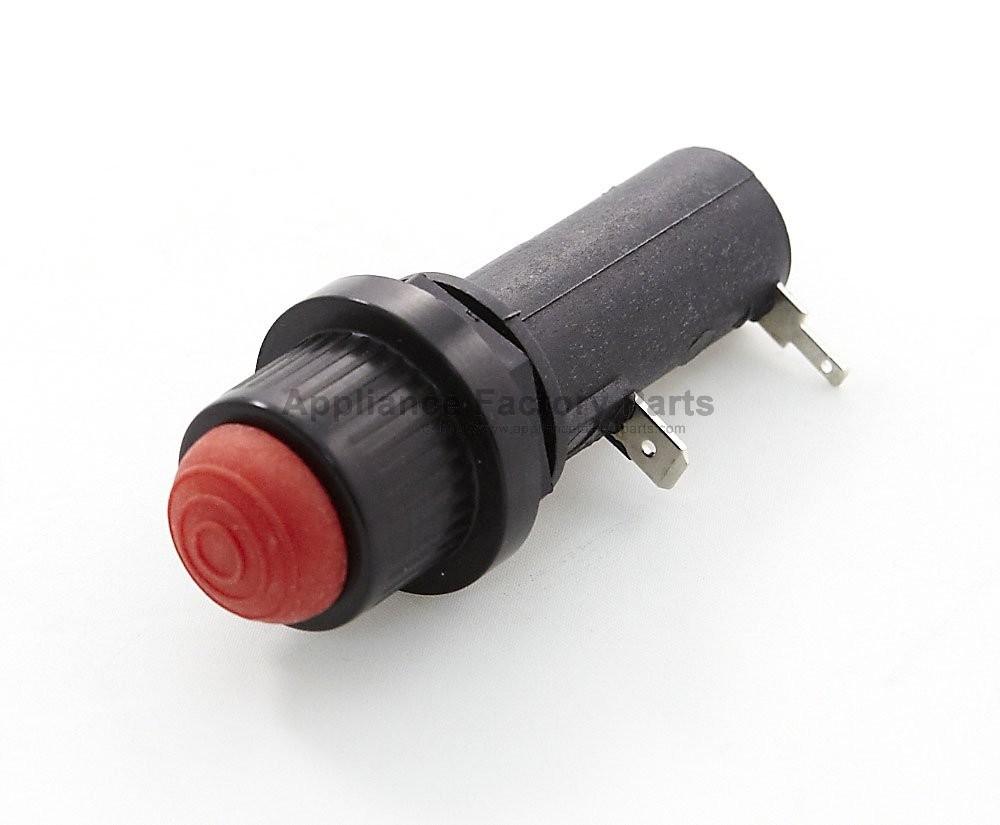
Igniters are responsible for lighting the gas in the grill’s burners. When they work well, igniters make grill-lighting as easy and convenient as pushing a button or turning a dial. But, not surprisingly, considering they do their job in an abusive environment of high heat, acidic meat drippings, and corrosive weather conditions, sometimes things go wrong. In fact, igniter failure is a common complaint – and source of frustration – for gas grillers.
True, you can usually light the grill by manually inserting a long match or lighter through a hole in the base of the grill. But, replacing the igniter is an easy and relatively inexpensive fix that will have you back in business faster than you can say finger-lickin-good.
Igniters are among the more complex elements of a gas grill. The visible part of the system is usually a push-button or a rotary knob on the control panel. Hidden behind the panel – and where the real, science-fair-worthy action takes place – is the spark-generating component.
The spark-generator contains a piezoelectric crystal. When the start button is pushed or knob turned, it triggers a spring-loaded hammer which strikes the crystal. The energy generated by this friction creates an electrical spark that travels down a flexible wire until it reaches an electrode tip at the end of the wire. The electrode is positioned within a small, open, metal box called a collector box that traps some of the gas going to the burner. The spark arcs from the wire’s electrode tip to the ceiling of the collector box, igniting the gas that’s been trapped inside. This, in turn, lights the gas in the adjacent burner.
Some grills have separate igniters for each burner, and the process must be repeated for each one. Others have cross-over ignition systems, in which one burner automatically lights the one next to it.
Types of Igniters
There are two main types of spark-generating igniters:
Troubleshooting: What to do when the igniter’s not working
Need to Replace?
If none of these easy fixes works, it may be necessary to replace the igniter unit. But before you do, try one more test. Manually light the grill with a match. If it lights, the problem is likely the igniter. If it doesn’t light, the issue may actually be a clogged or dirty burner. Clean the burner and test the igniter again. If the grill lights, there’s no need to replace the igniter. If it doesn’t, a new igniter will probably do the trick.
For a complete list of replacement igniter parts from Appliance Factory Parts, select your grill brand.
One important safety note: If a grill ever fails to light, always wait 5 minutes before attempting to relight it to allow the gas to dissipate.
Lisa Mayer April 21st, 2015
Posted In: BBQ Maintenance
Like a good sear on your steak? If so, you might believe you need a grill with a high-BTU burner. It’s a common myth that the higher a grill’s BTU rating, the more powerful it is. But, it’s really the design of the diffuser system together with the burner that determines how hot the grill can cook. A well-designed diffuser system can crank out more heat on a lower-BTU grill than a poorly designed system on a mega-BTU unit. That saves gas and money.
Heat diffusers are like middle children. They’re sandwiched between the burner and the cooking grid, and they’re often overlooked. But, they’re vital to your gas grill’s cooking performance and deserve some attention.
Heat diffusers have been used for ages – probably since right after people discovered food tastes better cooked over an open fire. Ancient civilizations realized that by putting stones, rocks or balls made of clay into the fire, they could increase the heat, spread it over a larger area, and make it last longer. Their food cooked better, too.
A barbecue grill works the same way. The burner generates the flames, and the diffusers hold, radiate and distribute the heat for better, more even cooking. Diffusers can bring heat to all areas of the cooking surface, beyond where the burner flames reach.
Depending on the grill brand, diffusers might also be called heat deflectors, heat distributors, flame tamers, burner shields, heat plates, vaporizers, or even flavorizer bars. Whatever the name, diffusers perform 3 important functions to make barbecuing better.
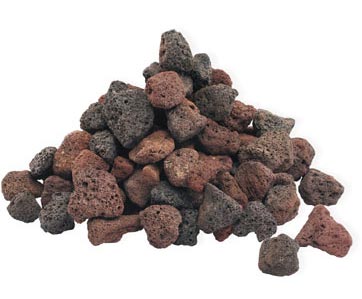 Lava rocks are craggy, reddish brown, irregularly shaped pieces of volcanic rock dotted with tiny holes. They were popular on early gas grills, but are less common today. The rocks sit on a rock grate an inch or two above the burner and a few inches below the grilling grid.
They hold and reflect heat well, last long, and are inexpensive. Since they are porous and absorb grease, some believe they create more flavorful smoke. Downsides: they take longer to heat up, and because they’re not uniformly shaped, grease can drip through the gaps between the rocks and reach the burner, causing flare-ups, hot spots, corrosion and clogs.
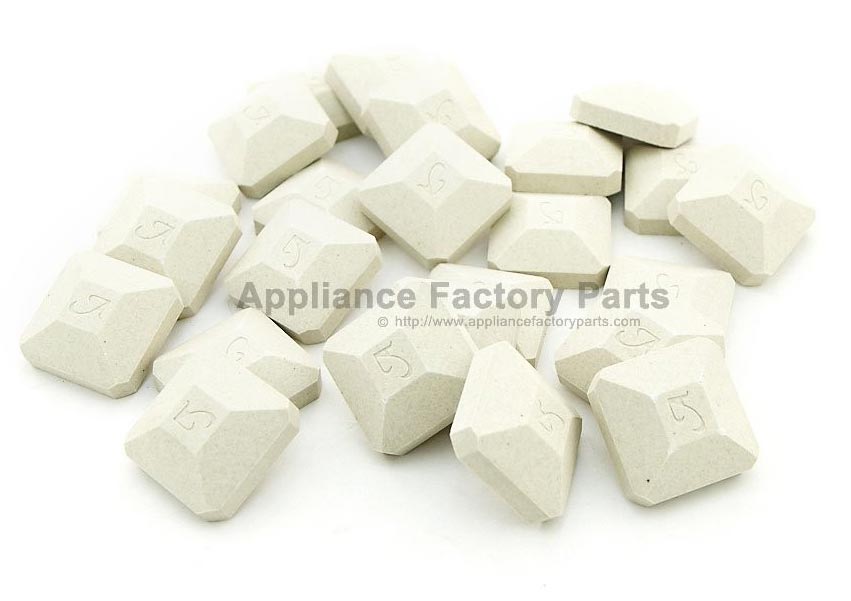 Ceramic diffusers are made of light-colored, heat-retaining ceramic material like the firebrick found inside many pizza ovens. They can be formed into pillow-shaped briquettes, rounded pucks, thin rods, or perforated flat tiles. Aligned edge-to-edge in a single layer, they can protect the burner better and distribute heat more evenly than lava rock. But, there may still be little gaps for grease to slip through and flare up when it hits the burner. Ceramic diffusers last a long time and are relatively inexpensive.
Metal diffusers are most common today. Stainless steel or porcelain-coated steel is formed into inverted-V tents, accordion-folded sheets, or flat plates. The metal heats up fast so the grill is ready for cooking very quickly. The angled diffusers channel grease away from the burner into a drip pan in the base of the grill. Though this virtually eliminates flare-ups, some argue it generates less smoke and flavor. These are also more expensive than other types of diffusers.
To clean ceramic briquettes, flip them over so the soiled side is toward the burner. Turn the burner to high for about 15 minutes and let the grease burn off. If they are especially dirty, use a stiff brush to remove caked-on residue before burning. The process can be repeated whenever grease builds up.
Lava rocks are cleaned the same way. It’s just a little trickier to get the grease out of the nooks and crannies. Also, because they’re porous, lava rock should be cleaned before a grill is put into storage or unused for a period of time, or they can get moldy.
Soak metal diffusers in a tub of soapy water. Use a grill brush to scrape excess residue off stainless steel diffusers. But, use a nylon scrub pad on porcelain-coated metals or they’ll scratch.
Replace lava rock and ceramic briquettes when they are crumbling or the accumulated grease is hard to burn off. Replace the rock grates if they are rusted, or warped and don’t sit evenly.
On metal diffusers, areas of rust or burned-through metal, are signs they should be replaced.
Find Heat Diffusers for your Brand
Lisa Mayer February 18th, 2015
Posted In: BBQ Maintenance


